准备工作
1.先搭建一个vue工程,这里有两种办法,一种是使用vue-cli ,另一种是使用vite(一种新的构建工具),具体搭建传送门
2.搭建好项目后,我们就可以安装对应的库了,这里需要安装以下的这些库:
- npm install --save
axios这个库不需要说使用next版本,vue升级和发起http请求没有直接的关系,所以axios不用说要不要升级安装axios官网 - npm install
element-plus--save 这个库是element 团队针对vue3而专门开发的库,对于vue3的库,除了elment-plus外,还有ant-design 等element-plus 官网 - npm install
vue-router@4这个是vue router 专门的库,现在还是带测试的版本,但是如果需要在vue3中使用路由,那么需要使用这个库,官网 - npm install
sass-D 这个是sass 的库,这里为啥不需要安装sass--loader或者style-loader或者 node-sass 呢? 这个在设计的时候,vue3 的缔造者 在设计vue 的时候已经考虑过这件事情,vite 这个构建工具里面集成了scss, less ,stylus 等, 原话如下That said, Vite does provide built-in support for .scss, .sass, .less, .styl and .stylus files. There is no need to install Vite-specific plugins for them, but the corresponding pre-processor itself must be installed as a peer dependency:vite 的官网 - npm install
vuex@next--save 这个是vuex的库,如果需要使用则需要安装这个库,vuex官网
最后我的package.json 的情况如下: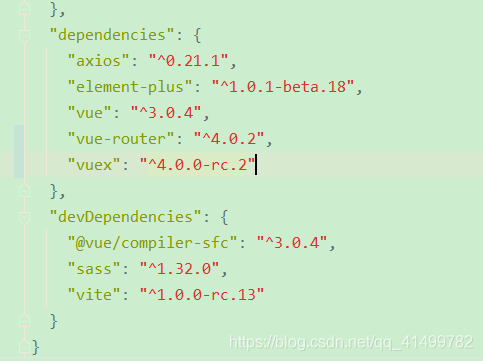
项目编写
在项目编写阶段,由于本人现在也是在体验vue3的阶段,下面可能也会有理解错误的地方,还请大家多多指教
配置vue的环境
直接在根目录建立vite.config.js,里面的常用配置如下:
const path=require('path')exportdefaultfunction(){return{// 代理,最重要,其他的都可以有默认配置 proxy:{'/api':{ target:'http://localhost:9011', changeOrigin:true,}},// 入口 entry:'index.html',// 出口 outDir:'./../public/html',// 打包后的跟路径 base:'/',// 输出的静态资源的文件夹名称 assetsDir:'assets',// 是否开启ssr服务断渲染 ssr:false,// 重命名路径 path.resolve(__dirname, './src') alias:{'/@/': path.resolve(__dirname,'./src')},// 端口 port:3002,// 是否自动开启浏览器 open:false,// 开启控制台输出日志 silent:false,// 那个包不需要打包 optimizeDeps:{ exclude:['element-plus']},// css预设的配置 cssPreprocessOptions:{ scss:{ additionalData:'@import "style/var.scss";',// 添加公共样式},}}}起步的main.js
创建一个vue的实例,导入element-plus, 导入vue-router,
或者vuex,但是这里都需要通过createApp链式调用来使用插件
import{createApp}from'vue'import Appfrom'./App.vue'import ElementPlusfrom'element-plus';import'../style/index.scss';import'element-plus/lib/theme-chalk/index.css';import routerfrom"./router";import vuexfrom"./vuex";createApp(App).use(router).use(ElementPlus).use(vuex).mount('#app')创建路由
在src文件夹下面创建router文件夹,里面配置vue的路由
import{createRouter, createWebHistory}from'vue-router';import{routes}from"./routes";const router=createRouter({ history:createWebHistory(),// 路由的history模式 routes,// 导入路由的配置, 和vue2里面的路由一样})exportdefault router;//注意: 在.vue组件中如果需要使用router,则需要导入useRouter这个方法,需要使用route,则需要导入,useRoute这个方法是否需要状态管理工具
如果需要使用状态管理工具,那个在src下面创建一个store文件夹,然后里面写vuex的配置,我这里使用的是模块,模块里面的内容和vuex3是一样的,调用方式也是一样的
import{createStore}from'vuex'import userModulefrom"./userModule";exportdefaultcreateStore({ modules:{ userModule: userModule,}})//模块例子exportdefault{ namespaced:true, state:{ isLoading:false, data:null,}, mutations:{// 设置是否正在加载setIsLoading(state, payload){ state.isLoading= payload;},// 设置用户数据setData(state, payload){ state.data= payload}}, actions:{// 登录asynclogin({commit},{loginId, loginPwd}){commit('setIsLoading',true);const r=awaitlogin(loginId, loginPwd)commit('setData', r);commit('setIsLoading',false);return r;},}}// 注意: 如果在.vue组件中需要使用store,需要导入 userStore的这个方法// 例如:在vue的setup函数中使用import{useStore}from"vuex";import{computed}from"vue";import{useRouter}from"vue-router";exportdefault{setup(){const store=useStore();const router=useRouter();constloginOut=()=>{ store.dispatch('userModule/loginOut'); router.push('/login')}return{ isLoading:computed(()=> store.state.userModule.isLoading), data:computed(()=> store.state.userModule.data), loginOut,}}}直接撸代码
对于撸代码的话,和vue2里面的差不多,只是vue3里面增加了compositionAPI 里面有比较大的改动,在写代码的时候,难免会有磕磕碰碰,祝愿大家在写代码的时候,写的都对。
这篇文章是基于本人想实现一个图片的网站,后台使用node,前台使用vue3,作为自己的练手项目,毕竟公司里面现在使用vue3对自己也哪方面都不好。 有兴趣的可以看看项目地址演示地址
热门文章
- java8 List<Object>去掉重复对象的几种方法_java
- 「11月29日」最高速度18M/S,2024年Singbox Node每天更新免费机场订阅节点链接
- Gin增删改查demo
- Unity制作一个小星球
- 异步复位同步释放在实际项目中的应用
- 「11月5日」最高速度19M/S,2024年Singbox Node每天更新免费机场订阅节点链接
- 「11月15日」最高速度21.1M/S,2024年Singbox Node每天更新免费机场订阅节点链接
- 「1月4日」最高速度20.1M/S,2025年Singbox Node每天更新免费机场订阅节点链接
- 关于Android安装apk出现解析包异常问题情况总结
- 活体买卖的法律纠纷 活体买卖的法律纠纷诈骗